Some guidelines to get started
First, it’s important to clarify that this article is about the first stages of the design process. There are many processes for developing and delivering a project. But when it comes to experimentation, there really aren’t any. And that is the point! It should be unstructured and free. So it is important that you aren’t forced to follow deliverables, deadlines, sprints, tickets, or any of that time-consuming silliness. That stuff comes later.
If you have an idea to improve a button? Prototype it! Do you have an idea for a new menu layout? Prototype it! Make the simplest, most minimal prototype that conveys your idea and play with it. Then improve it and show it to a colleague. Then improve it and show it to someone else. It’s all about the freedom to explore and any fixed process will get in the way of it.
It’s also crucial not to keep it exclusive to designers. Most products with world-class design aren’t only created by designers, but by a multi-disciplinary team. Other product team members, like developers and product managers, bring different perspectives, and encouraging them to create prototypes will lead to better ideas.
What is important to realize is that most of your ideas will be bad. And that is OK! Even if your prototype fails after many iterations, you will have learned something new and it will have inspired others. So even if one particular idea may not go anywhere, it will indirectly lead to a better product.
What tools to use for prototyping
There are many powerful tools available for building prototypes. As designers, we often get into discussions about which tool has the best features. But that is not the point. The best tool is the one you are most comfortable with and you can use to quickly visualize your ideas. It can even be through sketching or PowerPoint, it really doesn’t matter. In my experience, no one tool that can do it all. If you are unsure where to start, here are the ones that work best for me:
Figma (or Sketch)
The most obvious in the list is Figma of course. There are probably still some dinosaurs in the car industry who design everything in Illustrator or Photoshop, but by now most have made the switch. Because it is widely used and easy to learn, Figma is one of the most accessible tools for prototyping.
This also means that non-designers can easily get going with Figma. If you are not a designer, you probably don’t have edit rights on shared files. But that is not to stop you from creating your own and playing around. You’ll see that it is really easy to get started and a great way to visualize your ideas.
What Figma is best used for is higher-level concepts. Things like a new user flow, information architecture, page layout, or navigation. Simply draw some rectangles, connect them, et voilà, you have made an interface.
When we started creating our own infotainment system at Snapp Automotive, I mainly used Figma to iterate through hundreds of possible page layouts.
Protopie
One of the hardest things to prototype is anything involving hardware. Protopie is a purpose-built prototyping tool with a focus on the automotive industry. And it has simplified exactly that. It’s relatively easy to hook up a gaming wheel and use it as input for your prototype. On top of that, it has all the prototyping features of Figma but with much more advanced options for variables, animations, voice interaction, and dynamic data. As a result, it’s possible to create an almost fully functioning infotainment system.
With its advanced features and integrations, Protopie is more focused on high-fidelity prototyping. But you can use it for rapid prototypes as well! It’s perfect for hooking up hardware and testing interactions with it. I have used it to prototype new ideas for instrument clusters, to play around with voice interaction, and to prototype detailed interactions between physical controls and displays.
The downside of Protopie is that it can be easy to spend too much time creating a prototype. The process of importing assets from Figma, setting everything up, and debugging is often not worth the time for me. This is especially the case for smaller, more specific interactions that involve variables, animations, and unusual interaction modes.
For example, I’ve been playing around a lot with the idea of using sliders instead of buttons. Moving your finger up and down on a touch display instead of repeatedly pressing a button could be safer while driving. These new interaction modes aren’t really supported in Figma but they are in Protopie. Still, it requires a lot of work, and the level of control you have over certain details is pretty limited.
That is why I resort more often to code as a prototyping tool
Code
Code gives you total control over what you want to do. And with the help of design systems or default libraries, it is surprisingly fast to create a basic app. As with the other tools, there is no perfect programming language. I’ve used JavaScript a lot as it is easy to learn and widely used and documented. For example, I used it to build a prototype around gesture interaction on the steering wheel.
But more recently, I have found myself using SwiftUI more often as it makes building interfaces relatively easy. For example, for the idea of using a slider for climate controls, it’s important to be able to control details like animation speed, touch target size, and sliding speed. The great thing about directly creating the prototype in code is that you have total control over these details. So in an hour or two, I can have a very basic prototype of this slider. As you can see, it looks a lot better than the one built in Protopie, and the details are much more refined.
Programming is not for everyone. It has a high barrier to entry and as a designer, you should not feel forced to learn how to code. Another way to create these types of prototypes is by involving developers. Developers shouldn’t hop from ticket to ticket but think along with designers and be involved from the start of the process.
At Snapp Automotive, we’ve been doing this since the start of our company. Since most of the car industry is changing to Android for their operating system, we make most of our prototypes directly in Android. This means we can add the prototype immediately to our infotainment system. As a result, we get a much better idea of how it works in conjunction with the rest of the system, developers have more focus on design, and designers understand the technical side much better. Here is the example of the slider again, but this time in Android:
How to test?
Building a prototype is half the work. What is equally as important is testing it properly. At this stage of the process, it’s not needed to have elaborate setups with potential users and the whole works. It should be all about iterating rapidly and much like the tools, there are different ways depending on the idea. Here is how I do it.
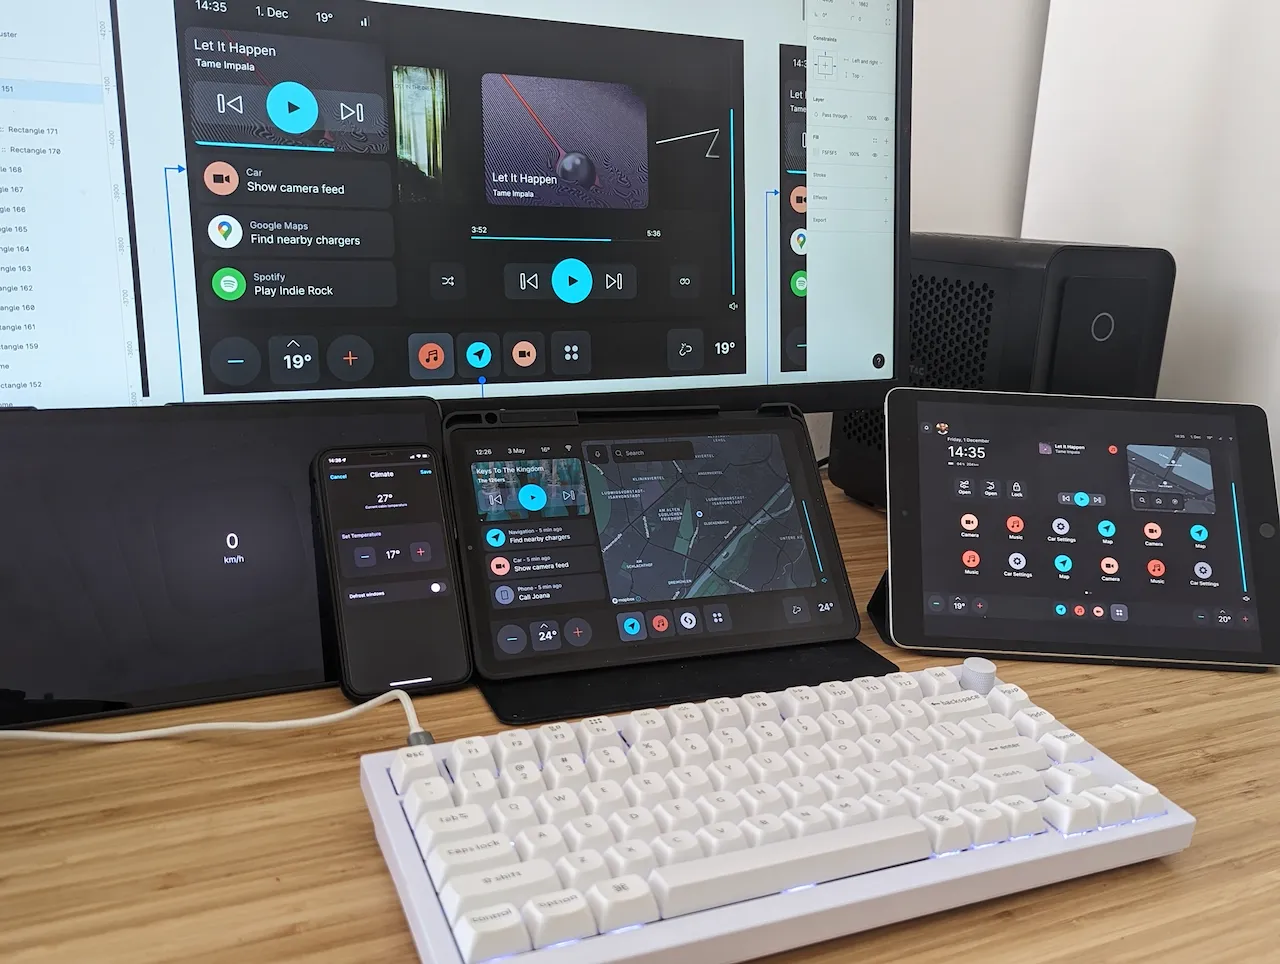
Tablet
I find that there is a huge difference between playing with a prototype on my computer, compared to opening it on my tablet. So this is where I start. Just sitting at my desk and interacting with the prototype on my tablet gives me a perspective that is already much closer to what it would be in a car. It is also by far the fastest way of iterating. Design something, play with it on my tablet, improve it, play with it again, etc.
Moreover, it’s super easy to walk around the office and have others try it and get feedback.
Inside a car
When designing for cars, considering the physical space of the driver is important. To test this, I often take my tablet to my car where I can mount it to the dashboard. Without driving, it is already enough to get the perspective of the driver. For example, to understand the physical effort it takes to interact with the prototype, whether the sizes are right, and how it blends in with the rest of the car.
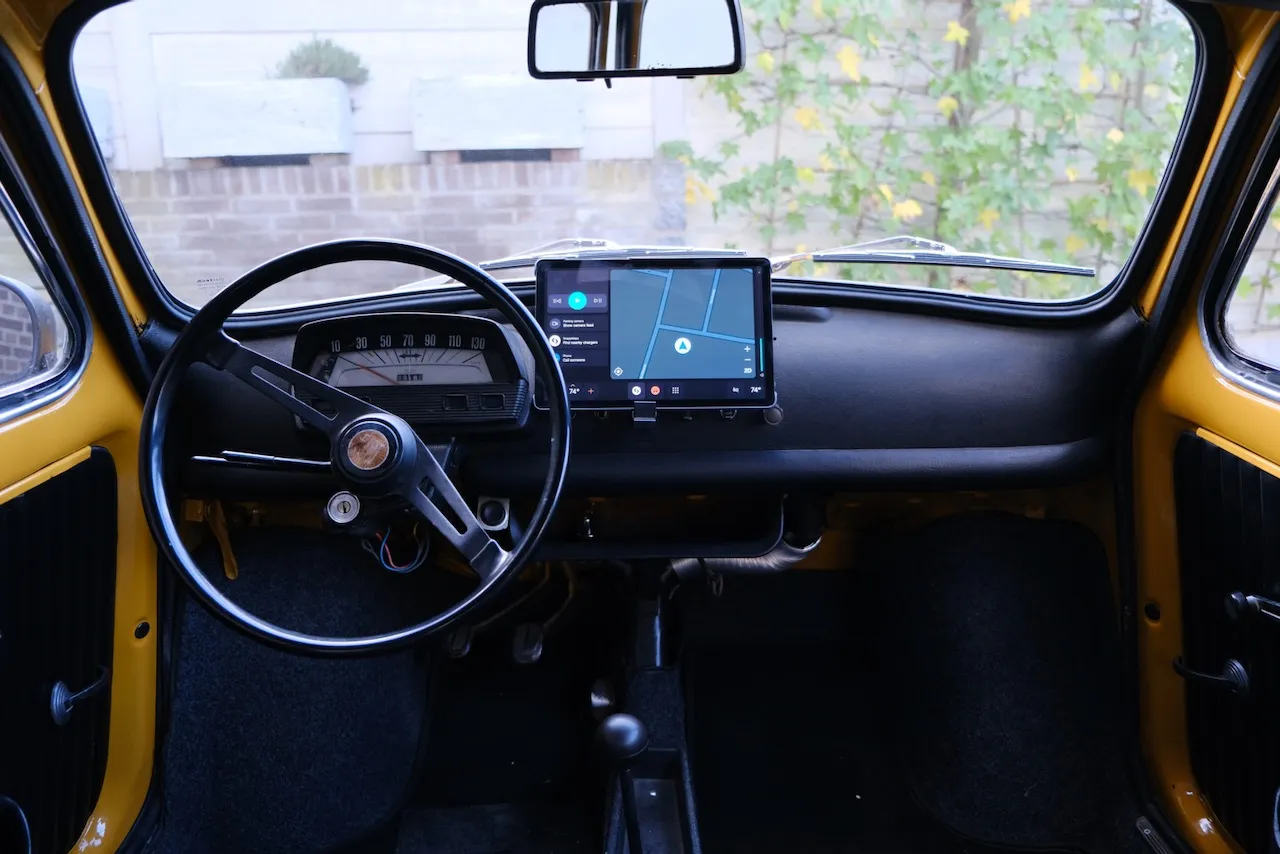
If you’d like to get an idea of how it feels like when driving, there is an easy way to do it. For example, early on in the process of creating our infotainment system, we had to develop guidelines for touch sizes. Unlike for web and mobile, there are no standards for that in the car industry. So we made a couple Figma prototypes with different button sizes and taped the tablet to the dashboard. We then drove around with one person as the driver, while the other interacted with the prototype. In an hour, you already have a totally different perspective on the interaction compared to when you are just trying it at your desk!
If you have access to a fancy enough car with a web browser, you can even open your prototypes in the infotainment system!
Use a simulator
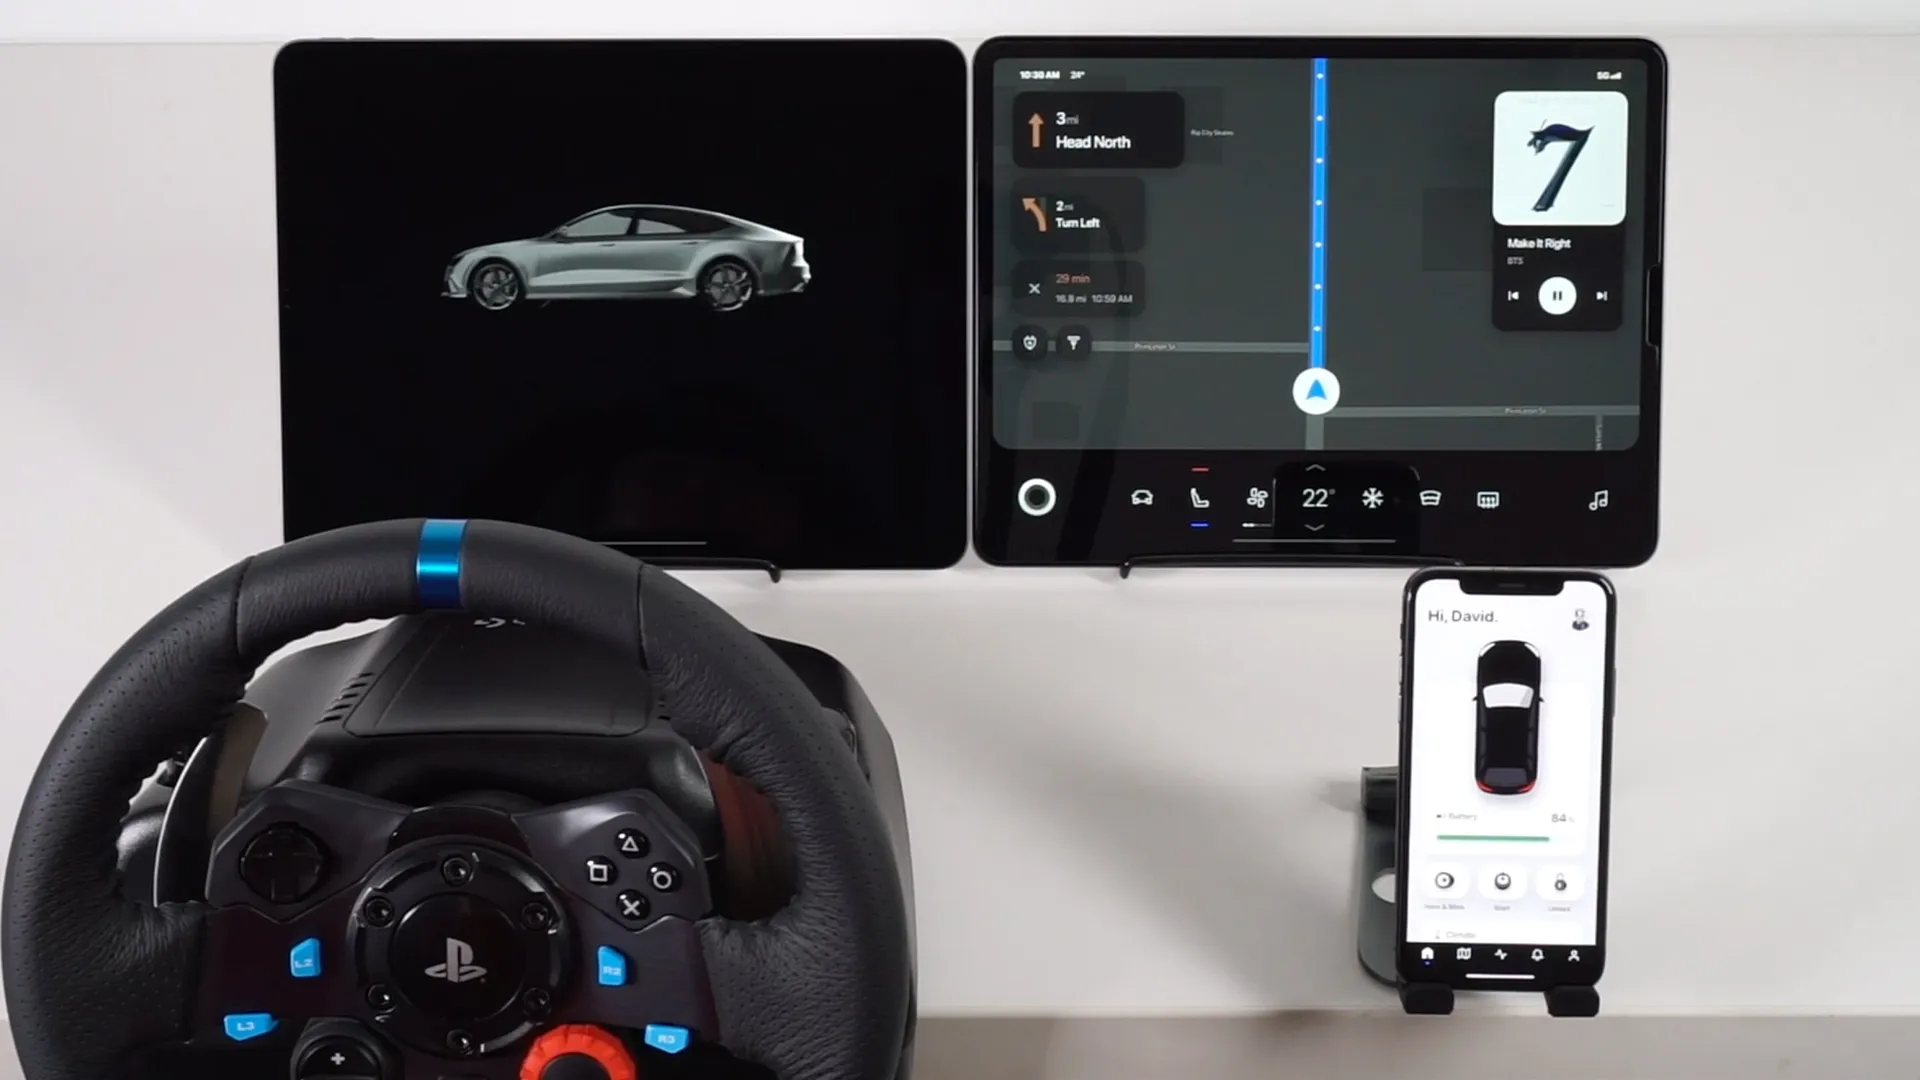
To get an idea of the level of distraction or the mental load of interacting with your prototype, a simulator is perfect. Most carmakers have very advanced simulators for usability testing. But these are for later in the process. At this stage, the goal is to get just a basic idea of the interaction.
Setting up a gaming wheel somewhere in the corner of your office is cheap and easy to do. A simulator helps to quickly get an idea of the mental effort it takes to interact with the interface. I tend to do a mentally loading task, like a racing game or difficult car driving simulator, and play with the prototype at the same time. For example, when I tested the difference between touching and swiping.
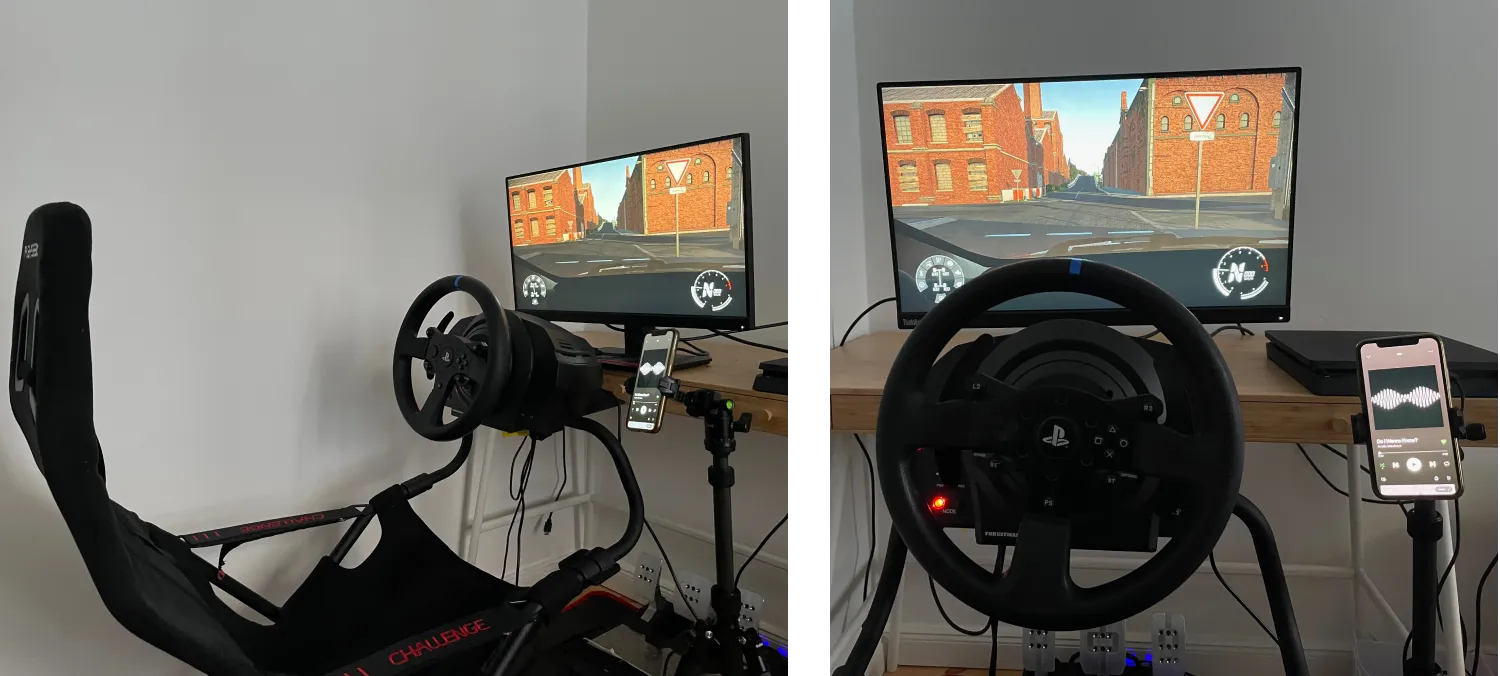
It will only give you a subjective idea of the workload and visual attention, but this can already be enough for a first test! And that is the point of this all, how can you get to a first prototype and test it as quickly as possible.
Naturally, once you have iterated enough and the basics are there, it is important to slow down and work on details, do usability testing, and think about technical feasibility. But before reaching that stage, it is crucial to be able to go from an idea to a tangible prototype quickly, have others try it, and repeat the process many times. It takes time and effort to go through this process and encourage others to do it. However, being able to freely explore ideas and experiment with your team will lead to much better final products! As I said in the beginning, it’s the number of iterations that counts most, not the talent of the team.
Get notified of new posts
Don't worry, I won't spam you with anything else